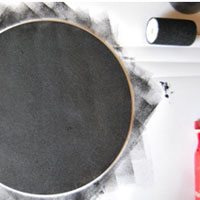
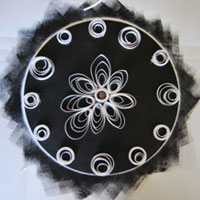
Quilled milk bottle clock
Quilled Milk Bottle Clock: Transform Plastic Waste into a Decorative Wall Clock
Repurpose plastic milk bottles into an eye-catching quilled clock! This project combines upcycling and the art of paper quilling (using thin strips of material to create coiled designs) with plastic, allowing you to craft a functional and decorative piece that reduces waste.
Materials You’ll Need:
- Clean plastic milk bottles
- Scissors or craft knife
- Ruler and permanent marker
- Clock mechanism (available at craft stores)
- Strong adhesive or glue gun
- Paint or markers for decoration
- Paper quilling strips or long, thin strips of plastic
- Quilling tool or toothpick for rolling
- Drill or awl (to create the hole for the clock mechanism)
Step-by-Step Guide:
Step 1: Prepare the Plastic Bottle
Clean and dry your milk bottles thoroughly. Remove any labels and sticky residue. You’ll be using the flat parts of the bottles to create your clock base, so cut out large, flat pieces from the sides of the bottles using scissors or a craft knife.
Step 2: Cut the Clock Base
Measure and mark the size of the clock base you want to create. For a traditional round clock, trace a circle onto the flat plastic piece. You can also experiment with other shapes like squares or hexagons. Cut along the marked lines to create the base of the clock.

Step 3: Drill a Hole for the Clock Mechanism
In the center of the clock base, drill a small hole large enough to fit the clock mechanism’s shaft. Ensure that the hole is positioned correctly and that the mechanism will sit flush with the surface of the plastic.
Step 4: Create Quilled Decorations
Using either pre-cut paper quilling strips or thin strips of plastic from the milk bottle, start rolling them into coils using a quilling tool or a toothpick. You can form these coils into various shapes such as circles, teardrops, or spirals. Once rolled, glue the ends to secure the shape.
Step 5: Attach Quilled Decorations to the Clock
Begin arranging the quilled shapes around the clock base, creating decorative patterns or numbers. You can design your clock face with minimalist or intricate quilled elements. Use strong adhesive or a glue gun to secure the quilled pieces onto the clock base.


Step 6: Assemble the Clock Mechanism
Insert the clock mechanism through the hole in the center of the base. Follow the manufacturer’s instructions to attach the hands to the mechanism and set it up. Make sure everything is secure and functioning before proceeding.

Step 7: Decorate the Clock (Optional)
If you’d like, use paint, markers, or additional embellishments to further decorate your clock. You can add color to the quilled elements or paint the background of the clock face to suit your style.
Step 8: Hang and Enjoy
Once the clock is fully assembled and decorated, it’s ready to be hung on the wall. Find a prominent spot to showcase your upcycled masterpiece and enjoy your new, eco-friendly timepiece!

Additional Tips for Success:
- Get Creative with Quilling: You can experiment with different designs and even create floral patterns, geometric shapes, or abstract art with the quilled strips.
- Mix Materials: Feel free to combine the plastic strips with traditional paper quilling strips for a mix of textures and colors.
- Make it Functional and Decorative: The quilled milk bottle clock is both a functional timepiece and a piece of art, so make sure to customize it to fit your home decor.
This project is a perfect blend of creativity and sustainability, allowing you to turn plastic waste into something beautiful and practical. It’s a great way to showcase your upcycling skills while reducing plastic pollution.