Bottle top bugs
Recycled Bottle Top Bugs: Create Cute Creatures from Upcycled Bottle Tops
Get crafty and eco-friendly by turning old bottle tops into fun, decorative bugs! This upcycling project is perfect for kids and adults alike, combining creativity with sustainability. Whether you’re decorating your garden or crafting something special with your kids, these cute bug figurines are a fun way to recycle. Follow these easy steps to transform discarded bottle tops into adorable bug figurines.
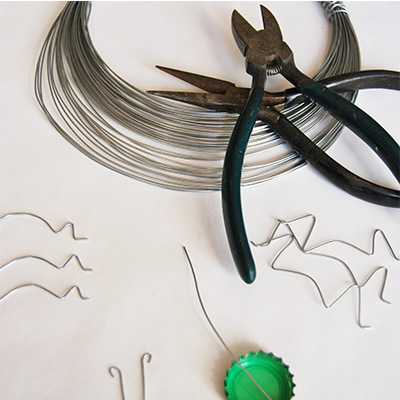
Materials You’ll Need:
- Bottle tops (metal or plastic)
- Paint (various colors)
- Paintbrushes
- Pipe cleaners or thin wire (for legs and antennae)
- Glue or hot glue gun
- Googly eyes (optional for added fun)
- Scissors
- Safety gloves (if working with sharp edges)
- Sandpaper (optional to smooth sharp edges)
- Small beads, buttons, or sequins (optional for added decoration)
Step-by-Step Guide:
Step 1: Clean the Bottle Tops
Start by cleaning the bottle tops thoroughly to remove any residue. If the edges are sharp, use safety gloves to handle them, or sand down the edges for a smoother finish. Ensure they are completely dry before painting.
Step 2: Paint the Bottle Tops
Paint the bottle tops in your desired bug colors. You can go for traditional colors like red for ladybugs or mix it up with bright, funky shades like neon green for fantasy bugs. Allow the first coat to dry, and then add details like stripes, spots, or wings with a second layer of paint. Let everything dry completely before proceeding.


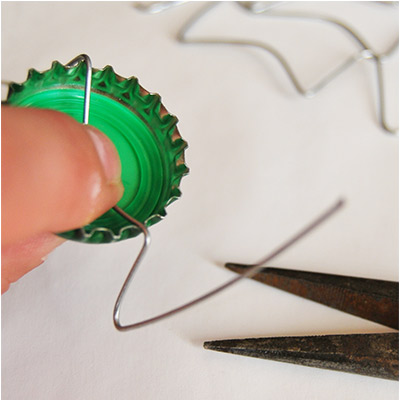
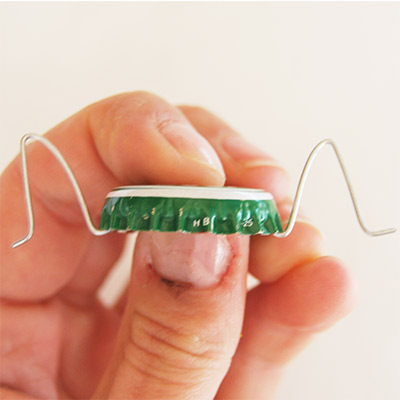
Step 3: Add the Legs and Antennae
Cut pipe cleaners or thin wire into small pieces to create the legs and antennae. Bend the pipe cleaners into shape, adding curves for realistic bug legs. Attach them to the underside of the bottle top using strong glue or a hot glue gun. For the antennae, glue smaller pieces to the top of the bottle top. You can get creative with different shapes and lengths for added character.

Step 4: Attach the Eyes
Glue googly eyes onto the top of the bottle tops for a whimsical touch. If you want a more sophisticated look, you can paint on the eyes or use small beads or buttons as eyes. Play with different sizes for a variety of expressions.
Step 5: Decorate the Bugs
Add unique decorations to your bugs! Use small beads, buttons, or sequins to create colorful wings or spots on the bottle tops. You can also use glitter paint or metallic markers for an extra shimmer effect. Personalizing the bugs with fun decorations makes them even more special.
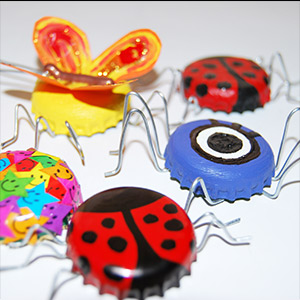
Step 6: Display Your Bugs
Once everything is dry and secure, your recycled bottle top bugs are ready to be displayed! Place them around the garden, create a bug-themed wall display, or use them as eco-friendly gifts for friends and family. These charming creatures are great conversation starters and are sure to brighten any space.
Extra Tips for Success:
- Safety First: Be cautious of sharp edges on the bottle tops, especially if kids are involved in the project. Sanding the edges or wearing gloves will help avoid cuts.
- Rain-Proofing for Garden Bugs: If you’re placing the bugs outdoors, consider using waterproof paint and sealant to ensure they withstand the elements.
- Recycling Tip: Collect bottle tops from parties or ask friends and family to save them for you. This way, you’ll always have materials ready for your next upcycling craft!
This fun upcycling project is a fantastic way to repurpose bottle tops while tapping into your creative side. Whether you’re making a ladybug or your own imaginative bug design, these little creatures are sure to bring joy to your space. It’s a perfect weekend craft that adds personality to your garden or home décor.