Garden signage
DIY Wooden Garden Signage: Personalize Your Green Space with Upcycled Wood
Add a personal touch to your garden with custom-made wooden signage. Using upcycled wood, you can create charming signs to label your plants, welcome guests, or add a decorative flair to your outdoor space. This project is simple, sustainable, and customizable to your style!
Materials You’ll Need:
- Reclaimed wood planks or pallet pieces
- Sandpaper
- Paint or wood stain
- Paintbrush
- Stencils or freehand templates for letters
- Permanent markers or paint pens (for writing)
- Wood sealer (optional)
- Screws, nails, or garden stakes (optional, for installation)
- Decorative elements (optional)
Step-by-Step Guide:
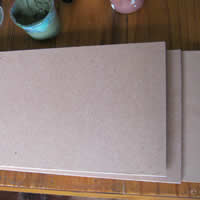
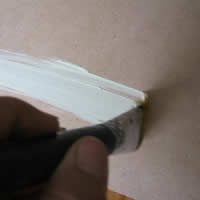
Step 1: Select and Prepare the Wood
Start by choosing a piece of reclaimed wood or pallet wood for your signage. The size will depend on the message or word you want to display. Sand the wood down to remove any rough patches or splinters, creating a smooth surface for painting or staining.
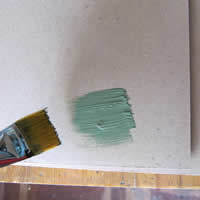
Step 2: Paint or Stain the Wood
Next, decide whether you want to paint or stain your sign. Apply the paint or stain evenly across the wood and allow it to dry completely. You can go for a natural wood look with stain or choose vibrant paint colors to make your signs stand out in the garden.


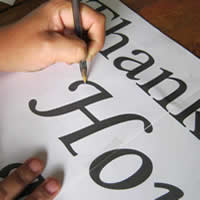
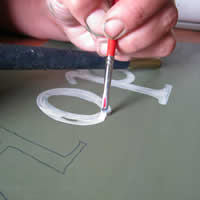
Step 3: Create Your Message
Once the paint or stain is dry, it’s time to add your message. You can freehand the lettering using a permanent marker or paint pen, or use stencils for a more precise look. Popular messages include plant names, quotes, or fun sayings like “Welcome to My Garden” or “Herbs Here.”


Step 4: Add Decorative Touches (Optional)
If you want to get creative, consider adding small decorative details such as painted flowers, vines, or other nature-inspired designs. You can also attach embellishments like beads or small recycled objects for a unique look.

Step 5: Seal the Wood (Optional)
To protect your wooden sign from outdoor elements, you can apply a clear wood sealer. This will help preserve the paint or stain and prevent the wood from rotting, ensuring your sign lasts through all seasons.

Step 6: Install Your Garden Sign
If you want your sign to stand upright in the ground, attach a wooden stake or screw it onto a garden post. Alternatively, you can hang the sign on a wall, fence, or tree branch using nails or hooks.
Step 7: Display Your New Garden Sign
Your upcycled wooden garden sign is now ready to be placed in your outdoor space. Add it to your flower beds, vegetable patch, or near your garden entrance to give your green space a personal touch.


Additional Tips for Success:
- Multiple Signs: Create multiple signs for different areas of your garden, labeling herbs, flowers, or pathways.
- Weatherproofing: Make sure to use weatherproof paint and sealers if you live in an area with heavy rain or extreme sun exposure.
- Eco-Friendly Materials: Using reclaimed or upcycled wood reduces waste and adds character to your garden.
This DIY wooden garden signage project is a great way to personalize your outdoor area while being kind to the environment. Whether you’re labeling plants or adding some creative charm, these signs will enhance any garden space.