What you need to make a hand made paper:
Materials you Need
Newspaper
Water
Dish to soak paper
Glue
Scissors
A bowl of your choice to use as a mould
Old/used plastic or cling wrap
Paint
Paint brushes
Modge Podge
Read through all the instructions first before starting this recycling papier mache craft.
Step 1 Prepearing the paper
Strip newspaper into small irregular pieces. In the dish fill some water and add a about a tablespoon or so of Glue. Instead of the glue you can add about 2 tablepoons of flour. Mix thoroughly, then add the paper to soak. You can leave the paper to soak for couple hours or even overnight.
Step 2 Making paper mache bowl
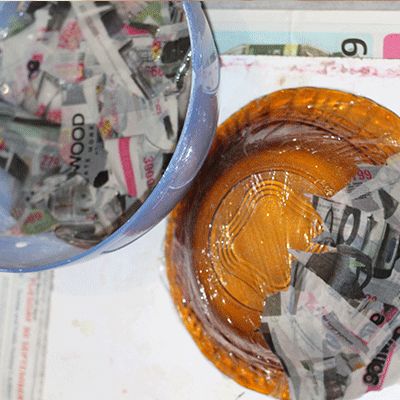
Turn the bowl upsided down and wrap the plastic on the outside of the bowl. Use a bit of cellotape to hold the plastic in place. The plastic is used for easy removal of the bowl when it is dried. Take your strips of paper and paste it onto the bowl making sure that each strip of paper overlaps the previous strip but keep the paper placement random. Don’t be too particular about having it squared all the time just as long the strip overlaps another strip already added on. Continue doing this till the whole bowl is covered. Repeat for about 5 layers.
(Please note that you can use the inside of the bowl as a mould instead of the outside of the bowl. I chose the outside of the bowl because I wanted the mache to catch the design of the bowl on the inside as you would see later on in the tutorial)
Step 3 finishing bowl before removal
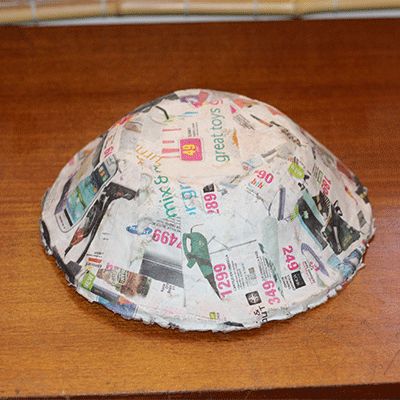
After about the 5th layer take some glue mixed in a little water and paint onto the mache. Here again you can use flour paste, made simply by adding water and flour together till you get a paste constistency or the constistency want it to be. Continue pasting another 5 layers or so of the stripped paper as in step 2. Again paint on the glue mixed in a little water. Let it dry completely. For bigger projects I would recommend more layers of paper applied. More layers of paper makes a more stronger project.

Step 4 Removing and finishing paper mache bowl
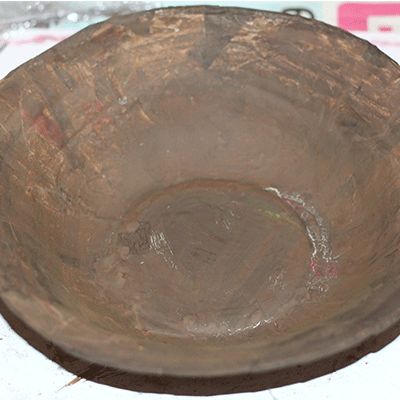
Once the bowl is completely dry, remove it from the mould and gently remove the plastic from the inside. Take a scissor and neaten the edges of the now paper mached bowl. You will also find that the inside of the bowl will have some lose paper coming out. Not to worry as you will now take your glue and water mix and paint inside the bowl also taking care to paint the edges so the it gets sealed too. Let it dry completely.


Step 5 Decorating paper mache bowl
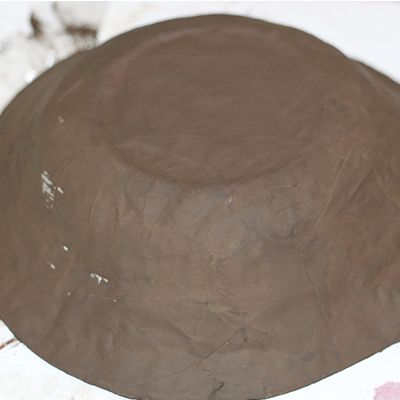
Once dried completely. Paint the bowl the colour that you like. When painting you will notice that the inside of the bowl has caught the pattern of my bowl mould as I mentioned earlier that you will see. I painted the whole bowl brown first then painted the inside red. You may have to give it 2-3 coats of paint. As you can see I have taken it a step further and painted some designs on the outside of the bowl.
Please allow for the paint to dry between each paint application

Step 6 Finishing off paper mache bowl
Once the paint has been dried completely apply your modge podge by painting it on. Make sure all gaping edges is covered sufficiently by the modge podge. Once water seeps through any gaps then your project will get water damaged. About 5 layers of modge podge should be sufficient leaving it to dry completely between each application. Leave it for 7-10 days to cure before using. Modge Podge is water and heat resistance but I will still be careful not to place my fruit bowl near water (kitchen sink) or heat (stove).To clean bowl just wipe with damp cloth. modge podge on paper mache bowl paper mache bowl cureing

